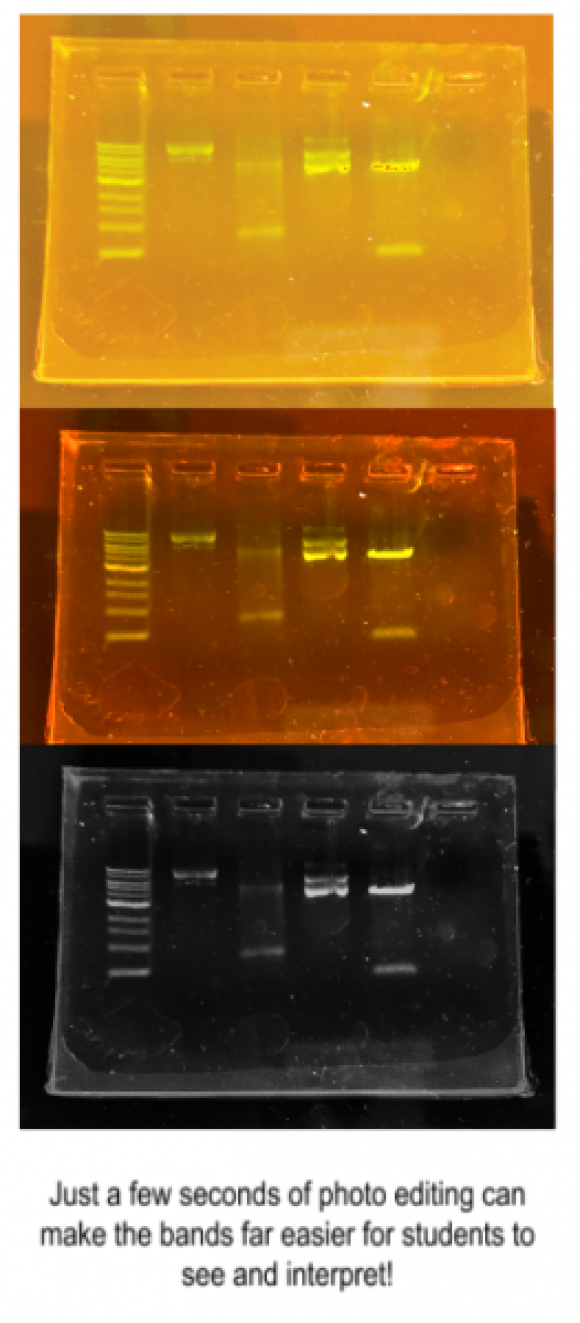
Gel electrophoresis is an important verification step in ABE's Foundations of Biotech labs. It allows students to determine the size of a product by comparing it with a DNA ladder. Learning to correctly perform the procedure and interpret the results takes practice; below are a few tips from our teachers and lab technicians!
TIPS FOR USING GELS WITH STUDENTS
- Make sure the gel is oriented correctly in the gel box and is right side up.
- Remind students to guide the tip of the pipette into the well with their non-dominant hand to avoid puncturing the bottom of the gel.
- Remind students to keep the pipette’s plunger depressed until they have removed the tip to avoid aspirating the buffer or disturbing their samples.
- Change out the buffer between gel runs.
TIPS FOR INTERPRETING GELS
- Have students complete the suggested gel prediction exercise before attempting to interpret a gel.
- Encourage students to photograph their gels and manipulate the images.
- Often, changing the contrast, brightness, sharpness, or other settings can make fainter bands easier to see.
- Sometimes, high-contrast black and white images are best!
TIPS FROM OUR LAB TECHNICIANS
- When making gels, use the largest, broadest combs possible to make pipetting into the wells easier for students.
- Stained gels need to be kept in the dark. Keep them in a drawer, box, or other area away from light. If using a MiniOne, the light will heat up the gel and cause photo-bleaching.
- To prevent this, turn on the light only every few minutes to check the gel.
- Bands will diffuse after 24 hours unless they are stored properly.
- Gels will last overnight in a sealed plastic bag in the fridge with a few drops of buffer.
- Some lab technicians have found that starting a gel at 50V for 1–2 minutes, then changing to 135V achieves the sharpest, cleanest bands.
Share your favorite tips and tricks for using gels by tweeting @ABEProgOffice!
